August 31, 2012

G's Room Redo

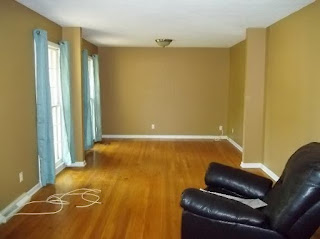
So you saw the before of G's bedroom, but in case you missed it, here it is again. All I have is the one picture, so use your imagination. All the walls are the same brown color as the rest of the house when we bought it.
 
G wanted a Cars theme, so we went with it for sure!  Here are a few pictures of the transformation!


It is striped with Olympic Black Magic on the Bottom, Snowy Mount in the middle and Red Gumball on the top.  I used Olympic Paint and Primer in One for all the paints so that it would take less time.  We have had all the floors refinished, and you can see the new floors in the pictures below.  The stripes were lots of fun, but took forever to tape off, level and paint.  I had to touch up a lot!  G really likes it!
 
And here are some pics of the finished room!
G's full name is on the wall, not just his initial, but has been removed from the pic for security reasons.
The big white blob is a repair from the floor refinishing and I still haven't repainted it. :)


The nightstand is a repurposed bookshelf cube! It has a shelf in the middle that you can't see due to the black paint.  Again, I repainted with a primer for laminate cabinets and the same wall paint from the room! No sanding needed!  Now I just need to add the vinyl stickers like the dresser below!

This is one of my FAVORITE projects that I've done!  I don't have a tutorial on this one either, but it involved a second hand dresser, primer, paint (same colors as the walls), casters and some diamond vinyl stickers.  It is a wooden dresser, NOT a tool chest! But it really adds to the theme of the room!

This was a store bought white wooden letter that I marked off the checkers with a pencil and used the wall paint to paint the theme! It looks great on the wall.

Just like in M's Room, I re-covered the builders switch plates with scrapbooking paper and modge podge! I don't have a tutorial on this, but there is a great one here!

Don't you just love the new floors!?! :)
 
All of the decorations, except the rug came from either a garage sale or craigslist!  I love getting things for little money!!


Our New Home!!

This April we closed on a beautiful new home (at least I think it's beautiful)!! :) And of course, even though it was move in ready, I feel the need to spruce it up a bit with my own personal touches.  I have already redone both of the boys' bedrooms and the family room, but still have a lot to do!  Currently I'm working on the dining room chairs and eventually there will be a big transformation there, but not for a while.  I'll post the progress as it happens, but for now, here's a few pictures of the new home "before." :)


Our New Home!!
Back of our home

Family Room 1

Family Room 2 (I love the built ins)

Our Formal Living and Dining Rooms (Dining is in the back)

G's Room

Master Bedroom (Great pic I know, there will be more later)
It's actually quite large with 3 closets!! :)
 
M's Room

Kitchen
The kitchen came just like this...

Easter Wreath

So I really wanted to incorporate the cross for this wreath and since it's only up for the season of Easter, I wanted it easy but simple.  I used the same grapevine wreath from my Spring Wreath and just removed the decorations to decorate it for Easter!  This wreath cost me $0 since I used supplies that I already had laying around the house!

Supplies:
Ribbon
Cardboard
Paint
Marker
Hot Glue

How to:
Trace a cross onto a cardboard box.  Then paint in the design and colors of your choice.  I raided my boys' craft paints and decided to use some polka dots. After the paint is dry, use a permanent marker to write the phrase of your choice.

I used a lot of ribbon for this design.  I actually used 2 different types of ribbon and cut them into 2 pieces.  Wrap the first piece starting at the top clockwise around the wreath.  When you reach the top again, glue the pieces together. Repeat with the smaller ribbon right on top of the larger ribbon.  Then take your second piece of larger ribbon, starting at the top and wrap the wreath counterclockwise.  Again, glue at the top, at repeat with the smaller ribbon.

Hot Glue the cross to the top and bottom of the wreath in the center and hang on your door or mantle! :)

August 30, 2012

Spring Wreath

So here is my Spring Front Door Wreath.  I had a lot of fun making this one.  Again, the idea came from Pinterest and I just gave it my touch.  This wreath cost me a little more than the $5 wreaths on my blog because I had NOTHING on hand, but since then, I've been able to reuse the supplies for other wreaths, so I'm happy!

Supplies:
Grapevine Wreath
Chip Board Letter
Spray Paint
Silk Flowers (mine are from the dollar store)
Wire Cutters or Scissors
Ribbon
Hot Glue

How To:
The most important thing to do first is to figure out where you want your flowers.  Cut them off from each bunch using scissors or wire cutters at the joints keeping as much stem as possible.  Then start placing them in between the vines to put them in place.  They will fit very nicely without glue and then you can arrange them and take them out and re-use the wreath again and again!

After the flowers are in place, tie your ribbon at the bottom.  I changed the color of the ribbon to a white one after I took the picture of course.  I think the white looked better.

Then spray paint your chip board letter.  I used a gold glitter spray paint, but you can't see it in the photo.  Hot glue your letter onto the wreath and you're done!  I hope yours turns out great!

4th of July Wreath

Okay, this is one of my favorite wreaths I've made!  I got the idea off of Pinterest and used another blogger's website for the tutorial.  You can view her step by step process here.  Sorry, I made the wreath before the blog, so there are not specific pics from me.  I made mine from coffee filters and cocktail napkins from the dollar store! So again, another $5 wreath!! :) I also got the wreath base from the dollar store! I think it looks great on my red door!  And it really stood out from the street!

My Fall Door "Wreath"

So I needed to spruce up our front door decor and had to take our 4th of July Wreath down, so I decided to whip this little one up.  I hope you like it! It literally only cost like $5 to make it, including the frame I got at a garage sale!  And of course, since nothing is permanent, you can change it whenever you like!!

Supplies:
Chip board Letter
Twine
Masking or Painters Tape
Frame
Twigs from your yard
Pine cone from your yard
Random silk flower
Floral Wire
Ribbon

How to:
Take the twigs, pine cone, and flower and attach them to the frame with floral wire.  No gluing needed!!  Then wrap the chip board letter in the twine.  Use tape to attach the last bit of twine to the back of the letter and then attach to the frame with the ribbon.  That's it! You're done and have a cute decoration for your front door! :)

My Family

So far our family consists of my wonderful husband P, my oldest G and my youngest M...of and of course, me, K. :) G is 5 and M is 2.  They both keep me very busy! As stated in the "About This Mom" section, G has Williams Syndrome, it is a genetic condition and you can learn more about it here. This makes life very interesting. On the other hand, my 2 year old is reading and developing more than G currently. P is an LPC in our area and I'm so proud of him and his accomplishments!

Bear With Me

So, over the past few months/years...etc I've come to realize that I'm the only one not blogging! :) I spend countless hours pouring over other crafty websites and searching other blogs to find the BEST tutorial or the cutest decorations, or the most creative ideas for my boys' birthday parties.  I also realize that unless I put all these great things that I've learned/done in one place, I may never remember them. And, then I don't have to tell my friends/their friends step by step instructions on how I did this or where I found that!  So, a blog is born!  I hope that you will bear with me.  Since my sister is the one gifted with the written word, I might lack in the literary skills, but I'll have pictures to help fill in the blanks.  Thanks for stopping by and I hope you enjoy!