Showing posts with label Holiday. Show all posts

February 10, 2014

Valentine's Day Mantle

Happy Valentine's Day!!

I love the way the red and pink and cream and all shades of Look like in my home.  Here's a pic of my current Mantle for Valentine's Day!
Let's take a look around...
 Remember these apothecary jars I made last year?!  They are still going strong and I use them for just about every holiday!  Here I just stuffed them with tissue paper in the coordinating colors.
 Here's a better look at this side.
 In the center I used the same window I used for my Winter Mantle and cut out some cute "I Love U" letters and then taped them to the window panes.  I left my family pictures up from the Winter Mantle.  This was a really easy turn over.
 Again, the same candle holders from my Winter Mantle and just grouped them to the same side.  I changed out the candles with some red and silver sparkly ones and voila...Valentine's Day! :)
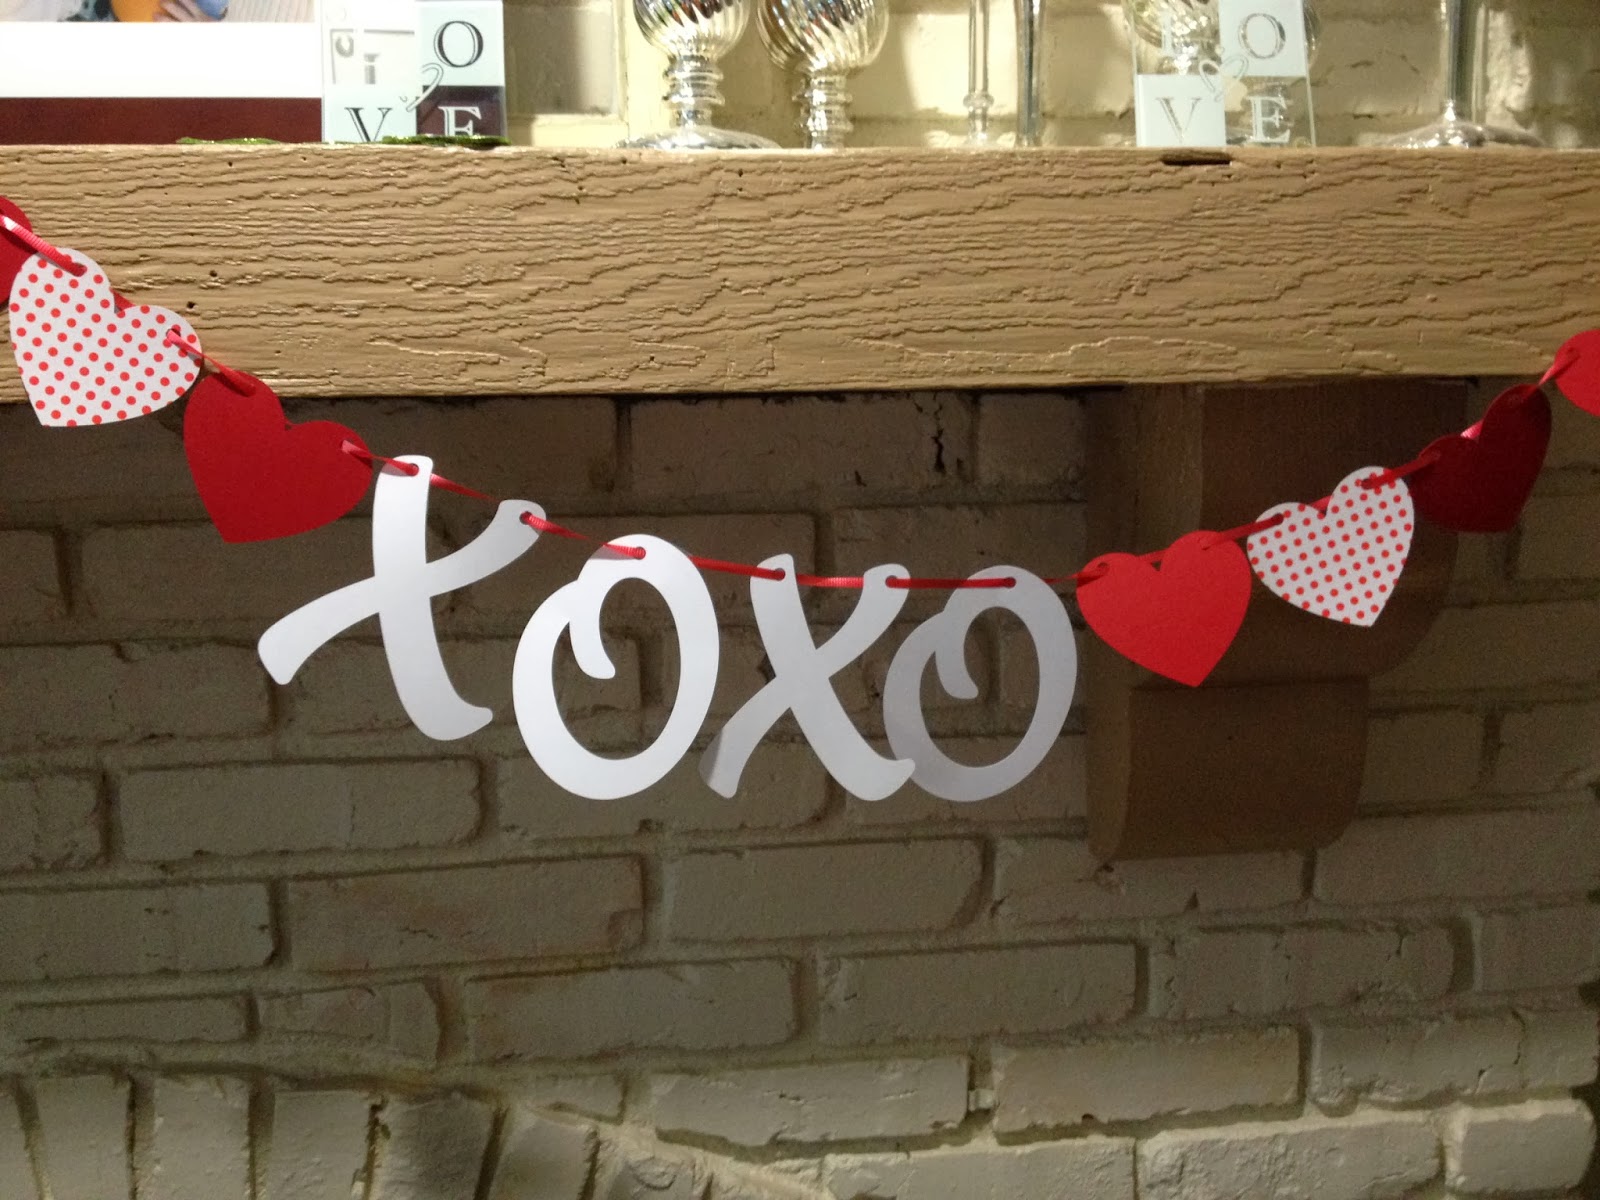
 This ADORABLE garland was made with my silhouette, but it is really easy to do so without the aide of my fancy machine.  You can find out how on My Craft Evolution!
 I love the way this garland turned out!
 I used curling ribbon to thread it together.
There you have it...my Valentine's Day Mantle.  Simple, yet festive! What do you think?!

January 2, 2014

Silver & Red Christmas Mantle

It's Christmas time again!!  Here's a pic of my beautiful Mantle:
So this year I decorated my entire house in the same manner as last year.  If you want to see details of those decorations, see my post here.

With that being said however, I was not incredibly in love with my mantle last year.  Here's a pic of the 2012 Christmas Mantle:
More or less...I did end up making the sign that I wanted to and it went in that big empty spot there.  Here is the sign I finished:
I love this sign!  A lot!  It really embodies the true meaning of Christmas and why we celebrate in the first place!  The only problem is that it did NOT match with the Country Christmas Decor that was currently gracing my Mantle.  I didn't even get any pictures of it all together because it was so close to time to take it down and I didn't really like it anyway.  

So, I knew that this year I would want something different.  And I knew it needed to match my new sign so I decided to go with a Silver and Red theme this year.  I scoured Hobby Lobby, Target and Joann's for discounted Christmas decor and tucked it all away in my Christmas Storage Closet.  Really not sure how it would come together for my 2013 Mantle.  

So this year, I pulled out everything I acquired and started to create.  I have to say, I AM in love with this year's Mantle.  See for yourself:
Here is a better picture of it with just the twinkly Christmas lights:
LOVE LOVE LOVE!!!  So here are the elements in detail...
 This is just a simple cardboard sign I found that was silver and sparkly...2 things I wanted in my Christmas decor.  I set it on top of my glass candle holders with some sparkly silver decoration ball things to give it some texture.
 Add a candle with sparkly silver glitter that I decorated myself using this post's tutorial and of course my silver stocking hangers.
 For the middle of the Mantle, I found these beautiful Luminaries depicting the birth of Christ and His visitors.  I love these!
I also made this Christmas Tree out of a Cereal Box!! Check back for a tutorial on how to make your own!  It is the perfect amount of sparkle and red to accent this almost monochromatic mantle.
On the right I found this silver (and sparkly) tree and hoisted it up with another glass candle holder and the same sparkly silver balls.
 And of course, some more stocking holders and another red candle.  You'll notice I also added some red tea light holders.  They were on Clearance at Target for something like 25 cents each...AWESOME!

And to top it all off, of course, my wooden sign that I spray painted silver!  Did I mention that I love it?! :)
You may also notice that my garland is a little different.  Again, for reference, here is the 2012 garland...
You may be able to see it, but in case you can't, there are pine cones and red berries all throughput this non lit, Country Garland.  And here is the 2013 Garland:
See, lights, no pine cones, no berries...at least not red ones.  THIS garland has little silver snowflakes and silver berries and some frosted branches.  It is still the same garland and the same red ribbon.  I actually added the lights as an afterthought, which is why they look all catty wonkered.  It will look better next year. :)

I hope you enjoyed my 2013 Silver and Red Christmas Mantle.  I do...and honestly that's what counts right. :)  I'll leave you with some beautiful pictures of everything as we like to enjoy it...Fireplace lit and all aglow!  Merry Christmas!


Avenger's Birthday Party

Success!  My little M turned 4 and he had a SUPER time!  There is a lot to show you about this party, so let's get started!!

First of all, here are some of the decorations!  This was the wall that was in the big room with the table.  I used a couple of $1 Tablecloths and taped them to the wall.  Then I hung a pre-made Birthday Banner and some store bought Star Twirly decoration things.
 Each room or decoration area had a couple of Heroes that made the theme/colors for that room.  This is the Iron Man and Thor Wall - RED, YELLOW and BLACK.  Worked out well!
Of Course, it would not be complete without these rosettes that I made out of scrapbook paper and cardstock!!  Want to know how to make these yourself?  I just followed a great tutorial I found online and decorated them with the icons of the Super Heroes.  Everyone got 2 rosettes.  One bigger and one smaller!  Of course, I forgot which tutorial I used and didn't Pin it, so if I find it I will link it here. Sorry. :)
 I think they turned out GREAT! It was a little time consuming to create so be forewarned!  That being said however, they were the most commented decoration at the party.  Worth the time in my opinion.
This is the Hulk/Hawk Eye Room.  Also known as the Food Table.  Under these streamers is my kid's artwork display in our breakfast area.  Usually I cover it up before hanging the streamers, but this was less work and looked fine!
 Of course here, the colors are GREEN, PURPLE and BLACK.  The boys liked this one the best!

 And here is the Captain America Corner!  The present opening space.  Captain America is M's favorite, so it was a must!
 Of course, the rosettes here will be able to be used again around the Fourth of July!! To decorate the area I used decorations I found on clearance from Walmart after the 4th!!  Very inexpensive and they looked great!!
 I did create this banner that showcased all of the Avengers for my little Super Hero!  Do you love it?!  You can get it at my Esty Shop here!!

 You can even get it with your little Super Hero's name on the banner too!
 Here are the Rosettes for Cap himself!
 Near the gifts I created this adorable Subway Art for my little Avenger!  I've made one for each birthday so far and the boys love it! Want one for your Super Hero?!  I have them available in my Etsy Shop as well!  Check it out here!
 Speaking of food!!! Check out this spread! A lot of thought went into this, so I hope you enjoy it!
 
 There's Iron Man Dad mixing up some Hulk Punch!  I tell you, there is no greater Man or Dad than one that will dress up like a Super Hero for his kid!  And a big plus that he helps out with the party food too!!  I love that man!
 First up on the Super Food tour is the "S.H.I.E.L.D. Spinach Dip.  It is just cold spinach dip and some chips.  I've also seen this done with Blue Corn Chips to make it look similar to the HULK.
 Of course, Hawkeye's Arrows for the veggie tray.  I cut the carrots, celery and peppers extra small so they would be uniform in size.  That's ranch dip in the center.  I used a sundae dish to put the dip in so that the veggies could fit on the plate around the stem!
 Here's Captain America's Shield for the Fruit Tray.  The star and white ring are mini marshmallows.  I formed the star by using a star shaped cookie cutter, putting the marshmallows in and then filling the area around it with the blueberries.  Once they and the 1st red ring was in place (raspberries) I lifted the cookie cutter and fixed the straggling marshmallows to look right!  The outer red ring are red delicious apples that we arranged to only show the peal.  This was a favorite for most of the kids and healthy too!!
 Iron Man got the Arc Reactors.  These are bagel bites that I added a small slice of mozzarella cheese to the center.  I just cut string cheese into small slices to make this easy.  Then baked them and put them on a plate!
 Thor's Hammers are pretzel sticks into cubes of cheese.  I used 3 different kinds because I like variety.  The choices were Extra Sharp Cheddar, Mozzarella and Colby Jack.
 I needed something more of substance to serve since this party took place during lunchtime.  I decided that I wanted to do Pigs in a Blanket, but couldn't think of anything cute to call them.  Then someone suggested to call them something with a uniform or suit...this is what I thought of: Avengers Suit Up.  It worked and was delicious! :)
Here is the cake that I made.  It was an in depth 3 day process. I made the fondant from marshmallows using this tutorial.  That was Day 1.  Day 2 was making the cake.  Of course, since everything has to be extremely complicated and can never be simple, I couldn't just make a white cake.  I had to create this:
Everyone was very impressed!  Especially M!  Day 3 of course was assembling and decorating the cake to become what you see here!
The Star was made with powdered sugar and the same cookie cutter from the fruit tray.  I accidentally threw away the unused white fondant before I cut out the star to decorate the top.  Mistake, but I kinda liked how the star looked distressed and all as the result. I do have to say, the cake tasted DELICIOUS and very very sweet.  Not at all like cardboard.  This was my first attempt at making fondant, and I'm not sure if I will do it again, but this was very cool!
 To drink, M wanted to have Hulk Punch so Green Punch it is!
 There were two types of drinks to choose from.  The one in the punch bowl is your typical Lime Sherbert and Lemon-Lime Soda Mix that is served at every Baptist Wedding or event. It was served at ours in fact. :) I think this was the first thing I ever learned to make. :) The beverage container held the Lemonade. I added a couple of drops of blue food coloring to make it green!  Looked and tasted amazing!
 Here are some pictures of the table that all the kiddos sat at.  Just your basic party tablecloths, left over 4th of July decor and some Super Heroes!
 
 Fun, easy and decorative!
 
For Favors I made a few things.  All the boys got Cardboard Captain America Shields and the girls got these Super Hero Masks made out of cardstock.  All the children got some adorable Super Hero Capes made from fleece and Velcro.  No sewing involved! Everyone loved it!  
Here's a pic of my sister modeling all 3 items. :)
 We had a great time!  It was really fun to create this party.  I hope you can get some great ideas for a Super Party of your own!! M got the Captain America costume for his birthday and had to change into it mid party. :)