January 31, 2014

14 Days of Valentine's Gift for the Hubbs

I don't know about you, but my husband loves to eat.  I mean...loves it!  We also don't really do gifts for Valentine's Day since our Anniversary is right around the corner in the next month, but we do exchange SOMETHING.  So this year, I saw this idea on the "Houghton Family Blog" and just had to execute for P this year.
Last year I made him the "52 Reasons Why I Love You" Deck of Love and that was a hit, but I needed something else. Later in her post, she put a link to some cute tags that her sister made on Etsy.  I just recreated the same tags myself, but if you want to buy them instead of making them, you can find them here.
Basically you take the cute sayings and attach them to the candy/food items and then give them to your loved one one at a time each day until Valentine's.  It's sort of like the 12 Days of Christmas, but it's the "14 Days of Valentines." You can attach them with tape like the gal on the blog did, or you can put them in cute bags with ribbon and such.  Whatever you like.  There are a few more than just 14 of these cute tags so you can either omit a few, or just give a couple on the same day a few times.  That's what I'm going to do. :)

Here's the list of the tag sayings and the Item it goes to:
You are PRICELESS to me - 100 Grand Candy Bar
I want you NOW & LATER - Now & Later
You stole a PIECE of my heart - Reece's Pieces
You o'FISH'ally have my heart - Swedish Fish
You ROCK my world - Pop Rocks
I am STUCK on you - Gum
I like the way you ROLL - Rolo
You are the STAR of my life - Starburst
I'm NUTS about you - Pay Day or Nutter Butter Cookies
I'd be in KNOTS without you - Chocolate Covered Pretzels
You are the APPLE of my eye - an Apple or Carmel Apple Sucker 
Being yours is a JOY - Almond Joy
You are my SWEETIE - Sweet Tarts
You COLOR my world - Skittles
I have a CRUSH on you - Crush Soda
Thanks for going to BAT for me - Baby Ruth
You are a HOT TAMALE - Hot Tamales
I SODA think you're amazing - Any kind of Coke or Soda product

The really funny part about this whole thing...I've been sick and wanted to make sure to have this all ready for him by Feb 1st.  I have not had a chance to get to the store at all due to this monster cold/flu thing so I made him go get all the candy. :) I just told him it was for Valentine's and he assumed that it was for our son's class...oh well. :) Little does he know he just bought his own Valentine's Gift! :)

Marriage License Canvas

I recently got an idea that I wanted to display our marriage license.  Of course I didn't want to just break out a shadow box, and display an old piece of paper with my bouquet, but I did want something unique and interesting, yet still true to who we are.  So, I came up with this:
 I took a piece of old canvas that was sitting around and painted a chevron pattern on it.  By the way, it takes a long time to tape off a chevron pattern! :)
Then I went to my Silhouette machine and cut out our initial onto a copy of our marriage license and modge podged it onto the canvas.  After that, I outlined it in black sharpie.
 Using the Silhouette again, I cut some vinyl of our names and our wedding date and stuck it to the canvas.
 Voila!  A unique and creative way to display your marriage license! P REALLY likes it.  He couldn't believe it was actually OUR license!  Perfect to display since this year will be 10 years! Time really flies I'm telling you!  What do you think?

January 21, 2014

Winter (Post Christmas) Mantle

It is always challenging to decorate after Christmas.  I love all my Christmas decorations, but after a while, it just looks like I'm lazy and didn't want to take anything down.  Plus, we have a birthday boy right after Christmas and I would rather the birthday pictures not be filled with Jingle Bells and Christmas Trees.  So I searched the ever Holy Grail of all things crafty for ideas.  I realized that in the Winter, we still have snow, we still have cold and it is still appropriate to decorate with greenery, just not "Christmasy," so here is what I came up with...
It's my Monochromatic (sort of) Winter Mantle!
 I put up my silvery candle sticks that I love so much!  I tried to keep with a brown/white/natural and Green Theme with this.  you know, to stay away from the "Christmas" idea, but still be Winter.  The only problem was the red votive candles that were melted in my candle holders that I didn't take the time to get out.
In the center I put up my cream window pane and some of our pictures from our Family Photo Shoot this fall.  I LOVE the picture of the 2 boys!  There is an even better on with them smiling and looking down and all happy with each other, as if there are never any fights and they are best friends.  It is blown up to 20x24 and on canvas in our living room. :) That way I can always "remember when."
I made this rosette out of cardstock and then cut out our family Initial with my new Silhouette that I got for Christmas!  I punched a hole in the top, added some tulle and then taped it to the back of my window above my pictures!  I wanted to have our initial somehow, but the only one I had was bright blue...it did not match my "natural" color scheme...thus this was created!  I love it.  It's just enough femininity that I'm happy, but not too girly that my hubbs complains. :)
 This is the same Christmas garland that I had on my Christmas Mantle.  I just took off the silver snowflakes, and red ribbons. Again, I wanted a more muted color palette for winter.
 
I added some sprigs of pine that had been frosted with a muted silver and some pine cones to keep with the winter nature feel and then also placed some cream berries in the garland also.  I kept the lights on it because I just love the lights!  It makes my mantle look warm and inviting.  like there is a fire going all the time. :)
I also made these "snowballs" out of Styrofoam balls that I got from the Dollar Store. They were in a package of assorted sized and then I stuck a toothpick in them so that I could "attach" them to the garland.  It was very easy! I didn't even cover them or paint them or anything.  The Styrofoam itself looks like little glittering balls of snow already!

And there you have it! My Winter (Post Christmas) Mantle.  It's almost time to start thinking about Valentine's Day! I wonder what I will do for that?...


January 11, 2014

Shiver Me Timbers!! It's a Pirate Birthday!! Arrgh!

Arrrgh Mateys!!!!  Captain Gabe is 7 Years of Age and we celebrated in Swashbuckling Style for this Pirate Birthday Party!!  Check out the Bounty Below!!


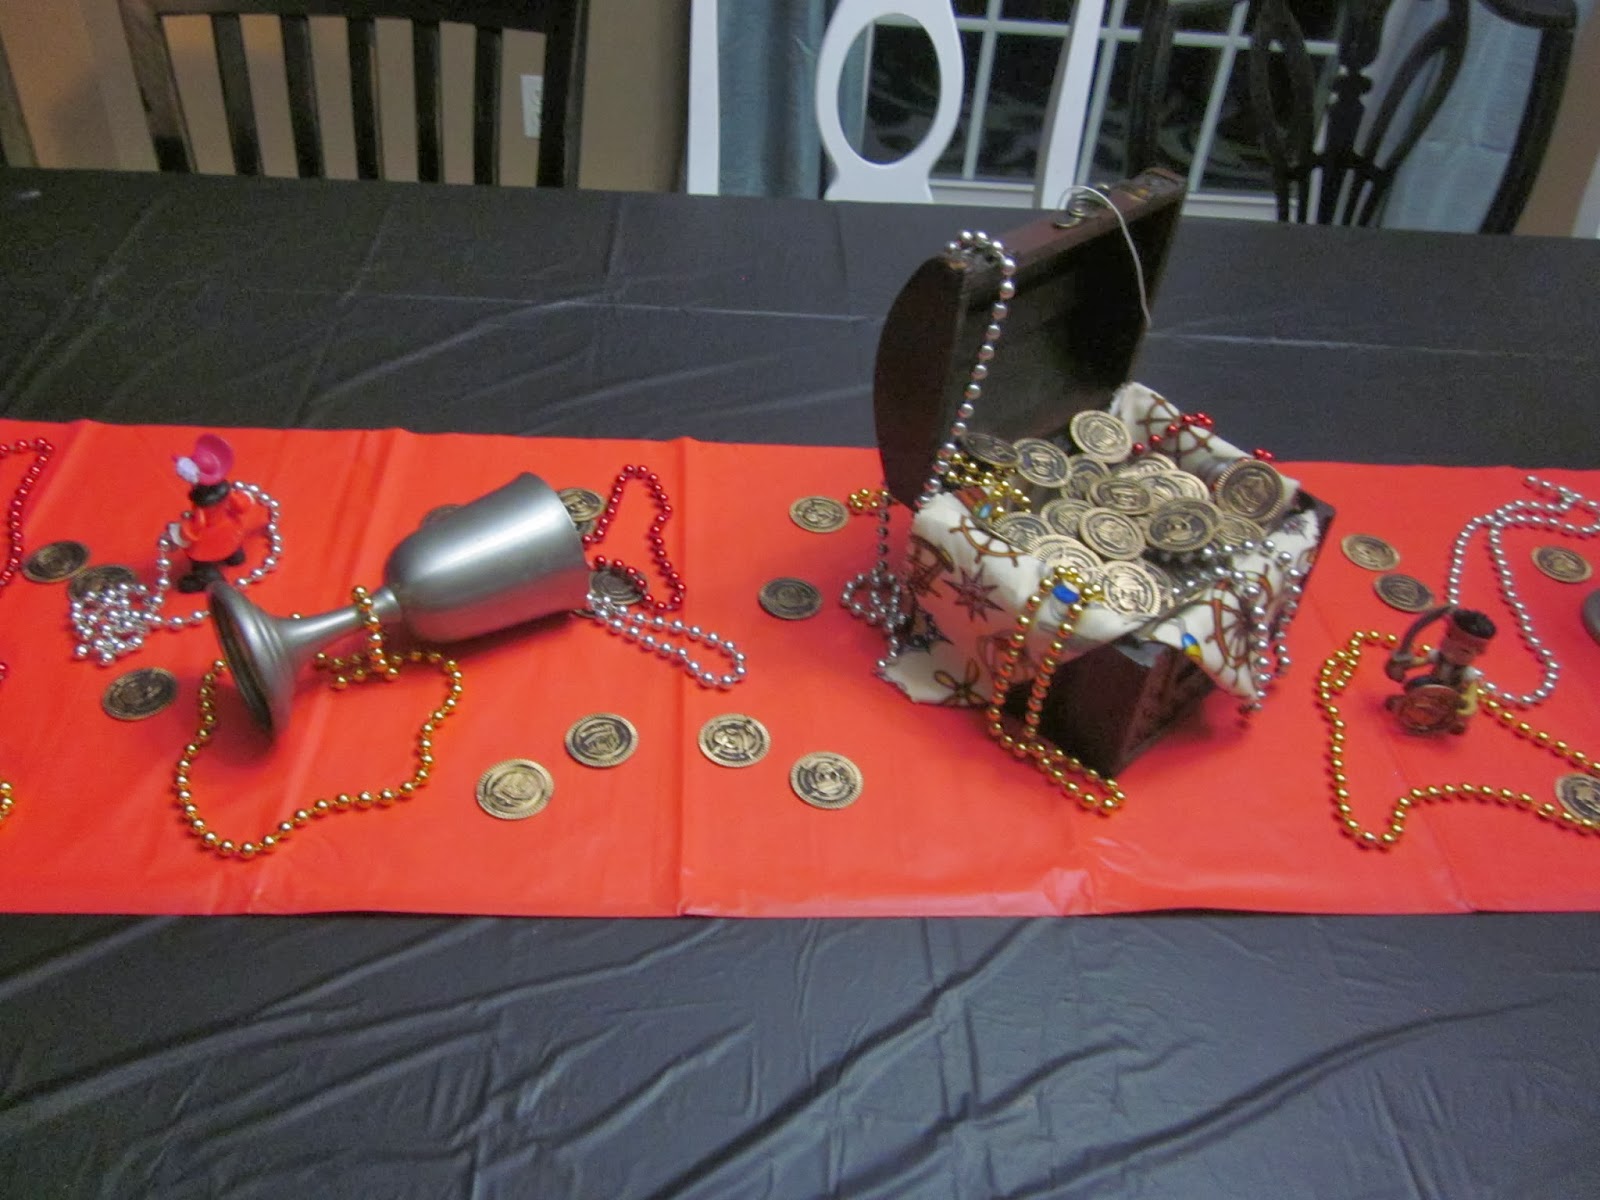
  The Table Center Piece display was made with Christmas Garland that I cut into "necklaces" and randomly threw about the table.  We have had these Silver Goblets in our Family for Generations and I'm glad they got some use!  Then just toss in some Gold Doubloons, a Treasure Chest filled with treasure and a few Jake the Pirate figurines.  Very easy!  My hubby kept saying that it looked like something out of Goonies. :) (Booby Trap, That's what I said!)
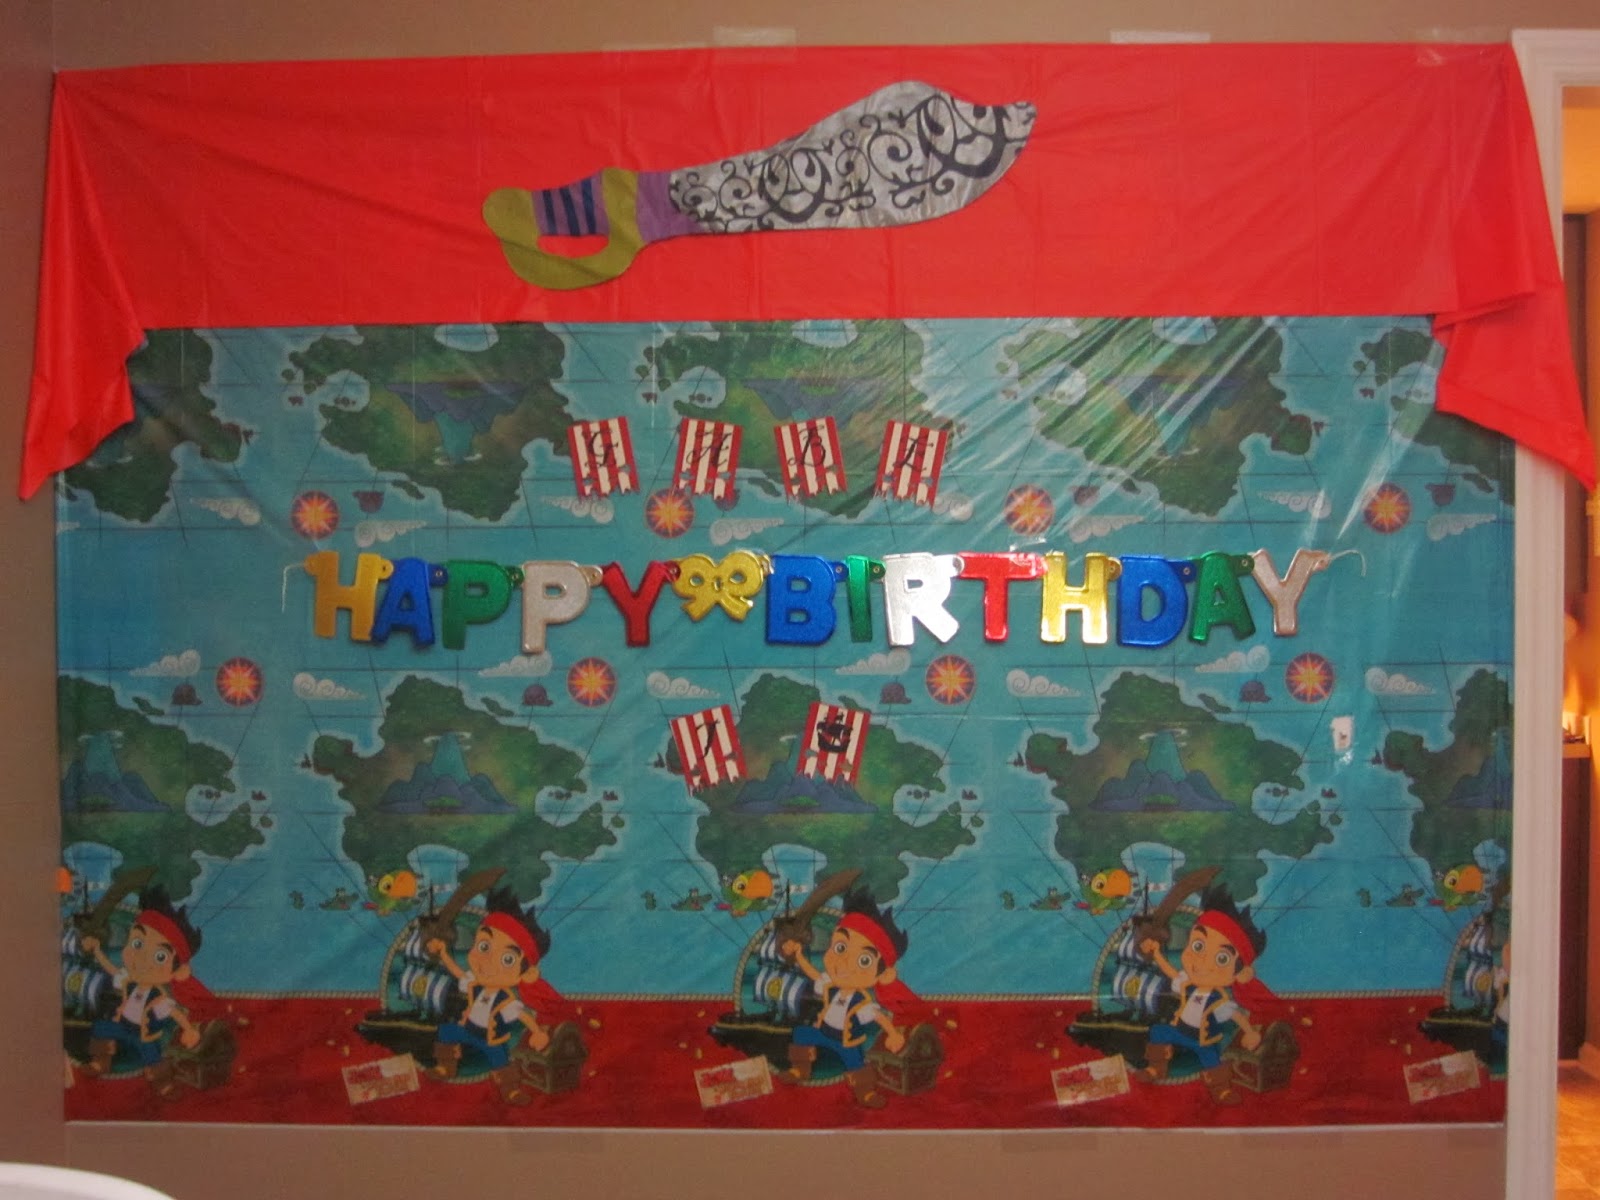
I love this Subway Art!  If you love it too, you can get it at my Etsy Shop as well as a lot of other great Party Decor Items!
 
 
 These were the Party Favors that I handed out.  Everyone got their very own Pirate Sword!  Luckily all eyes and fingers were in tact at the end of the party! :)
 More party favors!  The adults hid these at the end of the party so the kiddos could search for the buried treasure!  They had a lot of fun!
 FOOD!! What's on the table you ask?  Well let's make the rounds...
 Sea Water: This is just plain water with a few Blue Raspberry Powerade Drops in it.  Delicious!!
 
First Mates: I saw these guys on Pinterest.  I couldn't resist!  IT was a big hit and better yet, the kids loved them! It's just Bananas, Red Napkins (or fabric) and a Sharpie Marker!
 Pirate Jewels: Grapes in different colors! Yum!
 Silly Pirate!  G Picked this one out of all the designs that he saw for Pirate Cakes.  He thought the teeth were very funny and kept talking about the silly Pirate cake.  I skipped the Fondant this time and just used Store Bought Frosting in Cinnamon Roll.  I covered the cake and then died the rest of the frosting black with the Wilson Food Gel and piped on the Eye Patch and Decor.  The "Bandana" is made of Red Sugar and the Teeth are Mini Marshmallows.  It is a basic 3 layer 8" round cake and I used some extra cake from when I leveled it for the "nose" portion.  It tasted Delicious!! 

Here's what it looked like with all the candles in it! 
 I had some left over cake batter and we were expecting a lot of kids and parents, so I whipped up a few cupcakes as well. :)  Here's my Buried Treasure Cupcakes!
This Cupcake is just chocolate Cake Mix, Blue Icing all over and then Graham Cracker Crumbs on half of the cupcake.  Then push a Gold Doubloon into the "Beach" and you're done! Every Cupcake is a winner!! :)
 Dead Man's Fingers: Hot Dogs.  I cooked them in the Crock Pot to make it easy and to keep them warm! Just pile them in and cook them on Low for 4 hours, or High for 2 hours.  NO WATER NEEDED! They cook in their own juices.
 Cannon Balls: Black Olives
 Pirate Ships: This looks GREAT! It's just Blue Raspberry Jello and Orange Slices.  Then I made the flags with my new Silhouette Machine and hoisted them up on Toothpicks.
 Fish & Chips: Goldfish Crackers and Sun Chips.  You have to have a salty snack too, and what kid doesn't like Goldfish?
 The Decorations are made out of Wrapping Paper Cardboard Tubes and Plastic Table Cloths! The Crow's Nest is just a generic green pot that came with a Christmas Poinsettia that I covered in Brown Packing Paper. The Flag is a Chopstick and some Black Cardstock that I cut out.  And then I added the "G" from my Silhouette machine.

 My little Pirate had a great time!
 And here he is with Daddy dressed as a Swashbuckler Himself!
 M couldn't resist having a little fun also!
 Here's what the invite looked like.  I used more Brown Packing Paper and sent it through my printer.  Then I tore it and crumpled it and mounted it onto cardstock.  Made it look like a map to the big event! :) G helped with the crumpling part of it.

Well, I hope you enjoyed the Pirate Party Tour.  Feel free to use any of these ideas to throw your very own Pirate Birthday.