Now on how to make one yourself! Bear with me, there are a lot of photos, but I'm a visual person, so I hope it helps.
Supplies:
Fall type scrapbook paper or card stock
Clear Contact Paper
Ribbon
Scissors
Computer & Printer
Masking Tape
Ruler
Pencil
How To:
I found some 5.5" x 8.5" really cute handmade paper in my scrap booking stuff that was PERFECT for this! However, you can use any paper, card stock or even construction paper for this project. The "laminating" step will strengthen the paper, so it will be strong no matter how thin it is.
If you do use a larger paper, decide how big you want your letters. I think the size mine is is perfect for the size of my mantle, but that is a decision you will have to make. All my measurements are based off my 5.5" x 8.5" paper, just so you know.
Go into Microsoft Word or any other program you like really and create a word art of each letter. Choose a font you like, shape and color. I used Algerian Font size 470. Make sure you change your Page Layout to the size of paper that you have chosen. Center your letter and make 4 different pages (one letter per page). You could customize it with different fonts for each letter, or different colors of ink on your papers. I chose black because my paper is very ornate.
Print each letter onto your papers. You should then have 4 pages that look like this:
Next step is to draw where you want to cut your design...if you want one. Even though the paper was interesting, I wanted a little pizazz to my banner.
I found the middle of my paper (2.75") and made a mark.
Then I decided that I wanted my design to come about 1" high, so I made another mark 1" up on the page in the middle. Then I placed my ruler at the top mark, and then the corner of my page and drew a line with my pencil.
Now comes the "laminating" step. If you have a laminator at home, have at it. I do not, so I went the easy route and used clear contact paper to "laminate" my letters. The purpose of this is just to make it a little sturdier and to hold it together better so that I can use this again next year!
Take your contact paper and fold it on itself BEFORE you cut what you will need. Then lay the letter on top to measure how much paper you will need.
There, now you can cut off the contact paper. Remember to do this 4 times (one for each letter). You can see I used about 12 inches of contact paper. I wanted to make sure it would be enough. After you have cut your paper, peel the edge off and gently place your letter onto one side of the paper. Then carefully fold the paper onto itself to "laminate" your letter.
You will need to smooth out the contact paper over your letter. Be careful!! This is VERY sticky and can cause wrinkles. Unfortunately, if it is not smoothed well, you will either have wrinkles or have to do it all over again. I messed up once and it tore my paper when I tried to remove and re-smooth...hence the no picture for this step. :)
Next, cut out your letter. You can cut all the way to the paper edge, this will not separate!! Make sure to cut out your pencil design as well!
Here we are so far! Getting closer! Now it's strong AND waterproof! :)
Next, you need to cut a slit for your ribbon. I used my exact-o-knife, but scissors will work just as well. Again, I'm a perfectionist, so I measure everything. This measurement (because you are dying to know) was slit a total of 1.5" from the exact middle of the page.
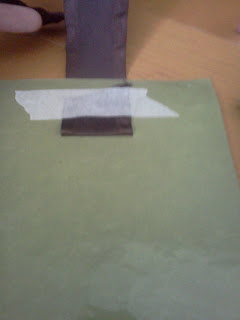
Now, push your ribbon into the front side of your letter and tape it on the back. I chose ribbon cut to 12". Again, look at your mantle or place you are hanging this and decide how long your ribbon will need to hang. Then add 2" to your measurement to secure the paper to the ribbon and the ribbon to your mantle or shelf.
Voila! There you have it. Do this to all 4 letters, then take your tape at the other end of the ribbon and tape it to your shelf or mantle! What do you think?! :)
To see pictures of my entire Fall mantle, that I created for only $20, click here. Happy creating!
I'd love to hear how yours turns out!


No comments:
Post a Comment