December 31, 2016

Elf on the CHRISTmas Shelf - Plan 2


Hello!  Merry Christmas!  Chances are, if you are reading this, you are either in the middle of your Elf season or preparing for your little Elf arrival!  Last year (2015) We started the Elf in our household.  The boys LOVED it and I can't believe we didn't do this sooner.  I did however want to change a few things about how this Elf thing worked.  We do celebrate Santa in our house, but we don't put any emphasis on having to be good or you won't get any presents.  That being said, our Elf is not here to spy on us or report back to Santa about the boys' behavior.  Instead, our Elf is here to point us back to the Reason for the Season.  So this year, I decided to expand on this concept and add a small devotion and on some days an activity to remind the boys that Christmas is about CHRIST and giving, not just getting.


Let me begin by this...I start planning our Elf's shenanigans as early as September.  I know, that's EARLY, but our December is SO crazy busy with not only the Holidays, but I throw 2 little boy birthday parties in that time frame too, so the LAST thing I have time for is to figure out what our Turkey will be doing.  Also, because I know I'm so scatterbrained, I set up a calendar and a very detailed document with pictures for me to go by.  This is GREAT NEWS for you!  You can download all these items here on my blog and not have to do much work at all!!

So, let's get on with it then.  Our Turkey (our Elf's name) arrived again this Season in a hot air balloon.  The basket was none other than the little boy's underwear (clean of course).  If you have boys, you know that underwear in general is one of their favorite things.  So I knew this would get lots of laughs.
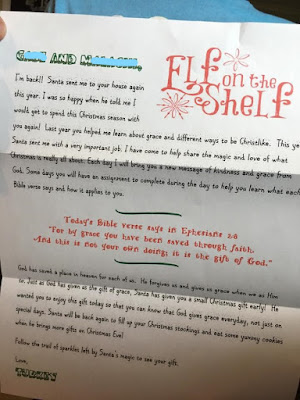
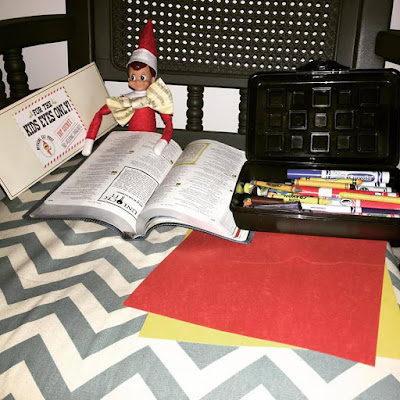
This year, I got a lot of my inspiration from a wonderful blog on a Kindness Elf. This gal has lots of great ideas and letters that help her kids stay focused on the real meaning of Christmas.  You can see her blog and posts on her Elf here. She had a lot of great ideas, but I wanted to change a few things to work for our household.  Every day, Turkey leaves the boys a letter with a verse and some instructions about that verse.  Some days he leaves an activity as well.  The boys have really liked these letters and our youngest is super proud to read them to us every day!

I first used some of the letters from the Only Little Once blog and entered them into a word processor.  I changed the names and a few details, put it on our "Elf on the Shelf" letterhead and then printed them out.  I found some cute envelopes from Office Max and then printed some labels to put on the front.

You can go on over to her blog and download her letters there.  She has them in a word format so that you can change the names to fit your child(ren) and elf(s).  It's great! I just changed a few details to fit our family and changed the font to our "elf" font and voila...instant devotionals!

 On Over the Big Moon, you can download a printable envelope with this cute graphic on the front that I used as my envelope labels.  I just used the front of the envelope and printed it out on paper.  Then I cut it out and glued it to the front of each envelope.  It made for really cute envelopes that OBVIOUSLY came straight from the North Pole. :)


On DAY 1, Turkey sent the kids on a scavenger hunt that led him to the car.  He was announcing one of our really fun traditions!
Here where we live, we have a drive thru light show.  It's really cool and it's called Christmas in the Park. We love going each year and this year, Turkey decided to go with us!  The scavenger hunt cards came from this blog.  The great news is that there are TONS of great clues here.  In fact, we only used about half (if even that) for our hunt.  I went ahead and printed them all and then laminated them so that we can use them year after year and each time I plan to switch them out with some new clues that I didn't use from the year before.  Of course, they are FREE to download and print!!

Turkey's letter today focused on being Content in all things.
 This is a REALLY hard concept to grasp as a kid.  In fact, I didn't expect them to understand it completely, but I did feel it was important to plant this seed in their little brains in the hopes that one day they will fully understand how to be content. They did a great job on the exercise, and I think eventually they kinda grasped the meaning of the verse.

DAY 2 - Turkey goes to church

This day fell on a Sunday, so Turkey took the opportunity to get dressed up in one of the boy's ties and have a Sunday School lesson of his own.  In fact, he thought it would be a great idea to have the boys write thank you notes to their Church Teachers to tell them how much they are appreciated.  This was super special to see their thoughts come to life in the notes.

DAY 3 - Slam Dunk Turkey
Turkey is practicing his basketball skills today.  Looks like he got a little stuck on the rim.

This was super easy to setup!  It was made from an empty pudding cup, some paper and tape and an orange marker. The ball is an orange pom pom, but could also just be some wadded up orange construction paper.  BTW - during this whole Elf season GLUE DOTS are my best friend!  I just use the mini ones to position and keep Turkey where he's supposed to be.  It really helps out a lot when something like this is needed!

Today, Turkey wants the boys to be nice to someone at school.  Since the boys play basketball a lot a recess, I figured it worked.
------------------------------------------
Check out my other Elf on the CHRISTmas Shelf posts to see everything that Turkey did and taught us this year!

Days 4-6
Days 7-9
Days 10-13
Days 14-17
Days 18-21
Days 22-25
Days 26-29
------------------------------------------
To download my entire Plan 2 Elf on the CHRISTmas Shelf document click here.  There are 30 different ideas here and it is complete with all the needed supplies and pictures (minus letters)!
I am happy to personalize my letters for you and your child(ren) if you like.  See my Etsy listing for 25 days of Kindness Letters that correspond with this plan.  You may always add more if needed for an additional cost.


You can also download and view all of Plan 1 by clicking here.  I hope you get some use out of this!!

September 7, 2016

Boys can have Frozen Birthday Parties too! - G turns 9!

What is all of this about "FROZEN" is just for girls?!  Sooooo not true!  In fact, my little G is obsessed with Olaf and Elsa and Anna.  Frozen is his favorite movie! So of course we had to have a FROZEN themed Birthday party!  It works very well because his birthday is in January, so a winter themed party seemed like a no brainier!
 
This year, G asked for a pinata!  I've never done one of these before, but this was a GREAT idea!  No hitting the snowman, just pull a string and out pops the candy!!

Here are the invitations that I made for G's party!
 You can purchase one for your little Frozen fan at my Etsy shop!

The backdrop for this party took a little more time than I prepared for, but it was really cool!
 
I took 3 different colors of plastic tablecloths and taped them on top of each other, then I cut strips in them all the way except for maybe a foot from the top.  Then I tied 3 strips at a time together near where I stopped cutting. You can kinda see the knot at the top under the "snow."  After all that was done, then I cut "snow drifts" from white tissue paper and taped them on top of the tablecloths to hide most of the knots. 
 
The banner is made out of foam both blue and white (white glued on top) and then I took a Sharpie and wrote on each piece.

I decided to take advantage of some store bought decor this year and I was very happy with the way it turned out.  I usually opt for the DIY stuff, but this actually was pretty cute!
 
The centerpieces, tablecloths and napkins were all purchased from the store.  G punched some snowflakes out of some white paper to use as confetti to decorate.  The cups are the cheapo white cups from the store as well and I just used a black and orange sharpie to draw Olaf's face on them.

I decorated the banquet room with Christmas ornaments! I just hung white snowflakes from the ceiling and then made these bad boys out of construction paper to hang as well.
 
Again, not hard to make, just time consuming. You can find a tutorial of how to make these snowflakes here. I used a full size of construction paper for each of these pieces so mine were pretty large!

Now let's move onto the food!!
 
The backdrop here was MUCH simpler!  I just used the Dollar Tree plastic tablecloth again and then taped some foam snowflakes that I again got from the Dollar Tree.  The poster was one that G got from a coloring book or something like that and really wanted to use it as part of the decoration. Who am I to argue with the Birthday Boy?!

I'm really excited and proud of the cake, so let's start with that!
 
 This is not a great picture, but my ceiling was apparently not high enough for me to take a picture with the whole thing in the full frame!  Here's a close-up of just half of his body though...
 
This was SO EASY!!! It's just a bunch of cupcakes placed together and then iced as one Olaf!!  I piped the arms on and the buttons and then added the face and voila!! Instant cake! There was no cutting involved or anything! Just hand out the cupcakes to each kid and there you go!  I'm going to see if the kids will allow something like this every year! I loved it and there was NO STRESS!!

Let's go around the rest of the food table...
 
These sandwiches are made from Hawaiian rolls, lunchmeat and cheese! I made a Turkey version and a Ham version.  No mayo or anything, just dry.  They could add mayo or ketchup if they wanted, but most of the kids ate them as is.
 
I think you can figure out what went into this. :)
 
Yep, just pretzel sticks.
 
This is just blue raspberry jello.  The kids ate it up!
 
Seriously...just...water.
 
Okay, so this I had to do a little bit of work...these marshmallows were dipped in chocolate and then covered in blue sprinkles.  I used cake pop sticks to do that with. I really meant it when I said a LITTLE bit of work!
 
One of my favorite items on the menu...Swedish Meatballs! And yes, they have to be Swedish!!  It is a FROZEN party after all. :) Yum yum!!

So for the favors, we again, utilized the store bought items.
 
Everything that went inside them came from a Favor Pack that was Olaf Themed.  Even the bags came with it!  Totally easy peasy lemon squeezy! 

And there you have it!!! I hope you found some great ideas and are ready to plan your next Frozen party for either a girl or a boy! Happy Celebrating!

Lego Birthday Party - M turns 6!

This post is a bit late...in fact, it's so late that M is about to turn 7.  I still can't believe that my baby is so old!  He wanted a Lego birthday party, so I wanted to share with you what I did!!

First thing's first. Here is the invite that I created for his party...
You can purchase this exact invite (personalized of course for your needs) on my Etsy Shop.


Here is his birthday banner backdrop.  I just took a few plastic tablecloths from the Dollar Tree and some colored paper plates and made this cute "Lego brick" backdrop.  I got the Happy Birthday Banner from Target already made. Bonus!! I made the name for Chi by printing out the letters on cardstock.  Super cute right?!

 Here are his favor bags.  I again went to Walmart and got cheap colored sacks and then printed out the lego logos from this blog here.
The favor tags were from this blog. Inside the favor bags were a few items.  Target actually has a really great lego favor section and I got most of it there:

 For the food table backdrop, again, I just used Dollar Tree Table Cloths and Paper plates.  Super simple.
 This was fun to make and FREE!! I just used his Lego bricks and built his name.  The cake however was a major disaster. I don't recommend replicating it. LOL.
 Fruit salad for no other reason than that's what he wanted and it's healthy. :)
 How adorable are these cheese Lego bricks?!
 You can't go wrong with Cheese and Crackers!
 This is a horrible photo, but it's just lemonade with a Lego face drawn in Dry Erase Marker.
 For the centerpieces, I just filled little buckets with Lego bricks and taped these free downloadable signs to some chopsticks.  I backed them with foam sheets from the Dollar Tree and glued them
together.
M wanted to help decorate, so I let him arrange his lego minifigs however he wanted. :)
 These guys were fun and the kids loved them!  Just plain yellow cups from the Dollar Tree and I used a Sharpie to draw the faces on them!
 WHAT?!?!
 Bad Cop
 Humph!
 This banner I did make.  I used foam sheets from the Dollar Tree and glued come circles that I cut from them as well. Then I printed out his name in a Lego font and voila!
 
 The birthday boy opening his presents

At least he loved the cake. :)

Thanks for stopping by!  I hope you got some good ideas for your next Lego party!

September 5, 2016

Elf on the CHRISTmas Shelf - Days 25-27

Welcome back!  This is the last of this year's Elf on the CHRISTmas Shelf Posts.  I hope that you got some great ideas for how to use your Elf to teach your children about the REAL Reason for Christmas.  I also hope that your kids learned a little something throughout the month.  Feel free to contact me if you have any questions with any of the set ups.  Let's get on with the last few days of ideas.

DAY 25 - NATIVITY CRAFT
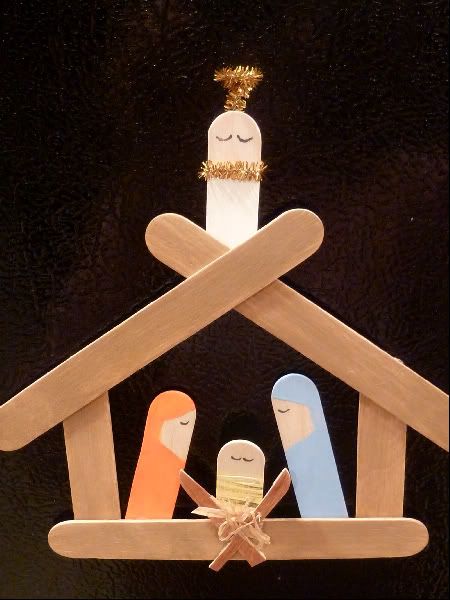
The boys are finally out of school and we need something to do with our time, so Turkey suggested that we make a Nativity out of craft sticks!  It is super easy to do and afterwards, we hung it on our tree.  The boys had a great time!
Displaying Image-1.jpg 
 Here is the sign.
And here is the craft.
 
You can find the instructions to make the craft on the blog What to Expect. It's super simple and didn't take very long to make at all!

DAY 26 - GROUP PICTURE
Turkey's time is coming to a close, so he wanted to document his stay with by taking a picture of his new friends.  This is super simple to set up.  I just used one of the kids' play cameras so that they wouldn't mess with my good one in the morning.
Displaying Image-1.jpg 

DAY 27 - CHRISTMAS EVE
Today is Turkey's last day with us.  Again, Turkey wanted to make sure that all his friends, and my boys, knew what the true meaning of Christmas was so he decided to read the Christmas story to everyone.
Displaying Image-1.jpg 
His sign today talks about how we should have a love for God's word. You can download it here.
 Also, since it was the last day of Turkey being in our house, he also brought this letter from Santa. 
 
You can download a copy of this letter here.  I've left the name off in the download so that you can sign it with your Elf's name if you want.

Of course, we told the boys that they were allowed to touch and hug Turkey before they went to bed so that they could properly say goodbye.  I think it was a success because several times throughout this year following our elf I've heard questions and comments about how they hope he will come back again this year. :)  Little do they know, I've already planned and set up the entire calendar for this year as well!  Keep checking, because I'll be posting this year's Elf on the CHRISTmas Shelf Plan 2 soon!

Thank you for taking this journey with me.  I really hope that you can find something useful from these ideas.  Check the links below for the entire plan.  I've attached a Calendar, a Supply List w/ Photos and also a link to all the cards/signs that go along with Plan 1.  Let me know if you have any questions or if you have a comment, please leave it below!  I LOVE to hear from people who read this blog!  Merry Christmas!
------------------------------------------
Check out my other Elf on the CHRISTmas Shelf posts to see everything that Turkey did and taught us last year!

Turkey Arrives
Days 1-3
Days 4-6
Days 7-9
Days 10-13
Days 14-16
Days 17-20
Days 21-24
------------------------------------------
To download my entire Plan 1 Elf Calendar click here.  There are 27 different ideas here!
To download the companion document listing all the needed Supplies and Pictures, click here.  
To download all the Cards/Signs that you will need for Plan 1 click here (not including Hello or Goodbye letters). You can also download every sign individually by visiting each post. I hope you get some use out of this!!