Showing posts with label Super Hero. Show all posts

December 30, 2014

Totally Awesome TMNT Birthday

Happy Birthday Season!  It's that time of year again where my littles change their age once more.  I kinda wish it would stop happening, but because I don't have that kind of control I guess I might as well throw an amazing party for the memories. :)

I've been very sick this year (strange medical anomaly that the Drs nor I can figure out...according to medicine/tests I'm the picture of health) so because of this, this year's party is scaled down from my previous years.  I still wanted it to be fun and since I knew how to decorate my house it did make it easier.  Because of such illness, I relied more on commercial products rather than making my own everything.  To my happiness, it was still a great party and everyone had a wonderful time!  This was the most well attended shebang that we've ever had and I think we set a record for the amount of people in my house.  I LOVED it!!

Anyway, M decided he wanted a TMNT party (Teenage Mutant Ninja Turtles).  Both boys have seen the movies and love the characters.  Also, it doesn't hurt that my husband grew up loving them too, so it was a bit of nostalgia for him as well.

On with the pics!!
Let's start with the favors.  I made these masks out of felt and fleece (whatever was on sale) for each child to wear.  Surprisingly enough, the Purple ones ran out before anything else.  There is one for each color of turtle (the darker "blue" is actually purple). It was super easy too...nothing fancy, just cut the pieces in strips and then measured my little turtle for where his eyes were and then cut circles so he could see.

We also had little buckets that we found at the Dollar Spot at Target.  We stuffed them with TMNT Stickers, some crazy straws and a few pieces of leftover Halloween candy! :)
Of course, you can see next to it, my signature Birthday Subway Art.  I make one of these every year for the kids.  I really think it's adorable and adds a nice touch.  If you want your own, you can purchase one personalized to your little on my Etsy Site!
 The other thing that I really wanted to do for favors was create shells for all the little guests.  The only problem is that I could only find 1.  It is made of a chip tray from the Dollar Tree but after literally searching the entire city, this 1 you see here is the only green tray in existence.  Very frustrating, but at least M got to feel special.
For the table, again I had to keep it simple, so I just purchased a TMNT tablecloth and added some streamers down the center.

There were LOTS of guests, so we had to set up an additional table.  They just got the streamers on their table. :)
For the centerpieces, I found these green pails at the Dollar Tree, set them upside down and then tied streamers around them and colored in eyes.  It was cheap and simple and added just enough to not look completely bare.

Just because I wanted to, I also hung some green balloons from the ceiling with the different colored streamers.  Again, easy and decorative.  :)

 I also had this Happy Birthday Banner that I added to our mirror just for fun.
To welcome all the guests I made this again, simple sign and hung it on our door.
It totally matches the invitations that I made!! :)
 Again, you can totally get your own on my Etsy Site!

Also, did you know that you can reuse old Mylar balloons?  You can keep them after they have deflated and either take them back to your local party store to re-inflate with helium, or you can just use a balloon pump like I did and re-inflate with plain old air!
It doesn't float of course, but looks cute on top of my lamp. :)

Our birthday chair of course needs to be decorated too...here's the simple and effective way for that!!
Streamers and balloons...the theme of the event!  I found this birthday banner at Target of course and the personalized part?...plates.  Just plain old TMNT plates that I used a sharpie on. :)
Now let's get on to the food.  My favorite part! :) Here's the full spread...

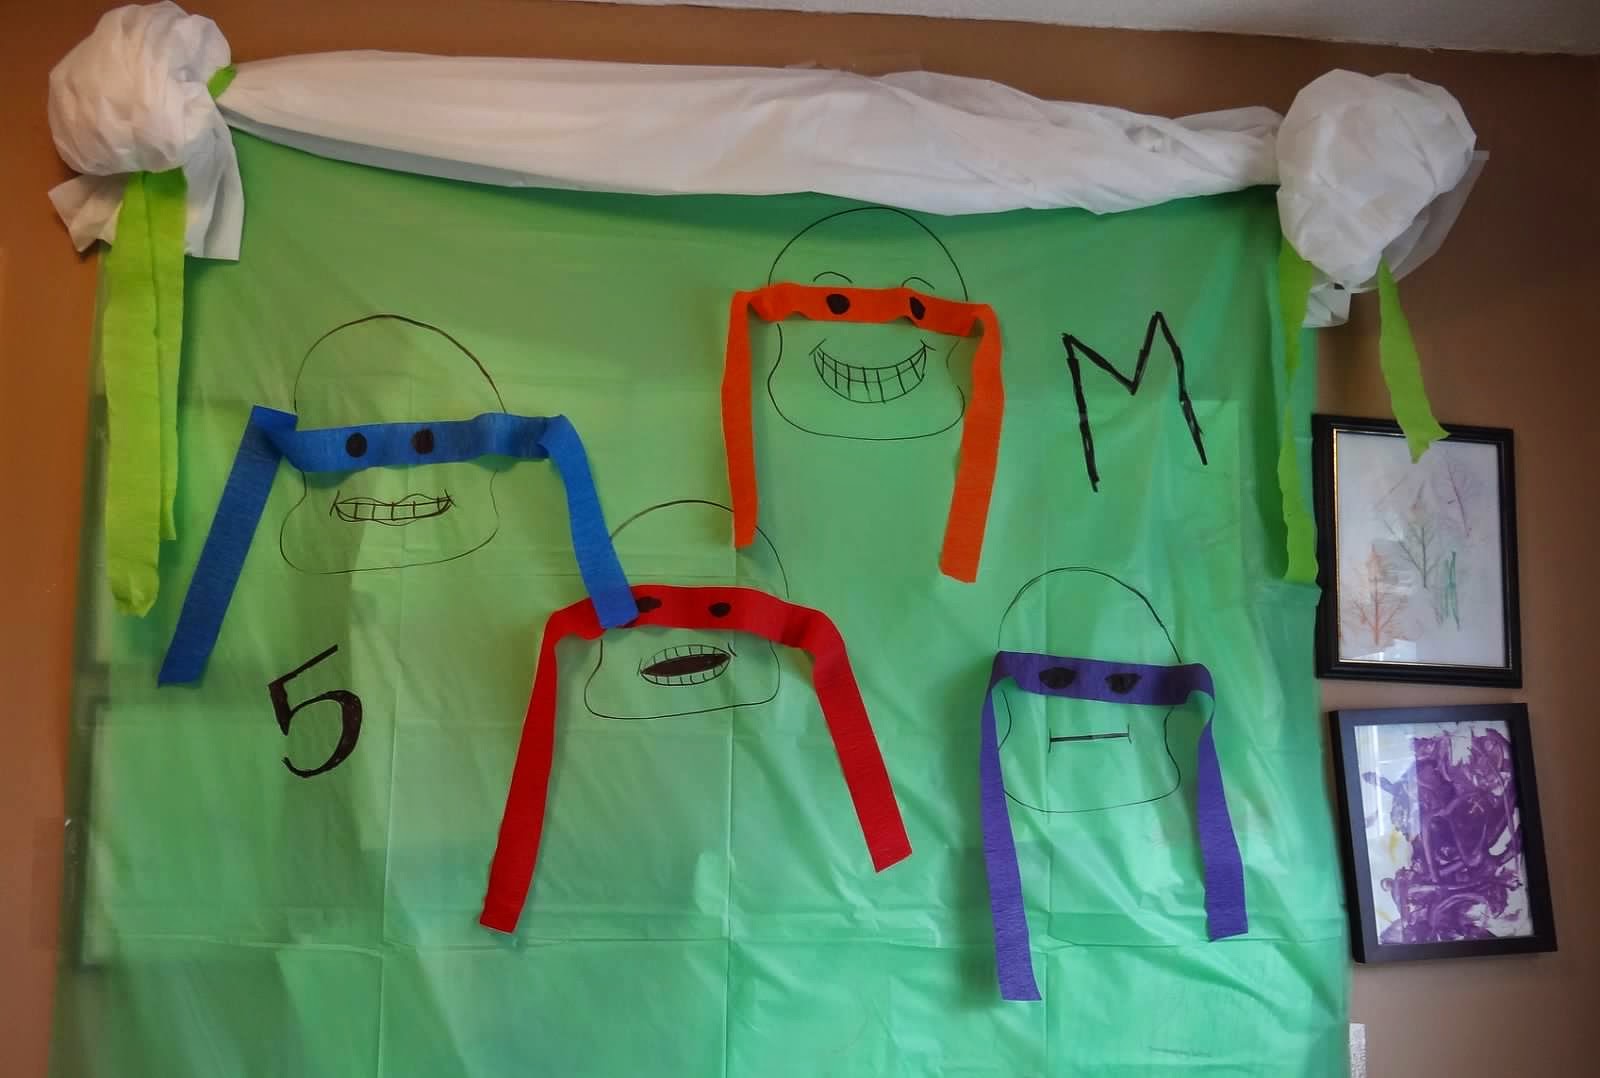
The background is just a plastic tablecloth with again, some streamers and a sharpie.
Up top, it's another plastic tablecloth tied with...you guessed it...streamers. :)

The food was very simple to put together and I'm lucky that these are all of M's favorite foods anyway. :)
 We'll start with the healthy stuff (surprisingly enough, this is M's preferred fare...he LOVES broccoli)...I know...I'm blessed. :)
 Mikey's Veggies: Broccoli, carrots and the eyes are marshmallows with olive slices on top.  The smile is also made of black olives.
Raphael's Fruit: Green grapes and strawberries.  Again, the eyes are marshmallows and sliced olives. Smile is also olives. :)  Adorable, I know.
Sewer Lids: Oreo Cookies...easy
Turtle Food: Pizza.  We had 2 kinds, Pepperoni (because that's the turtle's favorite) and Hawaiian (because that's my turtle's favorite)
Sugar Cookie Pizzas: As an activity, we had all the kids make their own "pizzas" with Sugar Cookies, Red frosting as "sauce", Coconut as "cheese" and M&Ms and Skittles as their "peperoni."  It was a BIG hit!!
 Some of the beautiful and delicious creations.
To drink we had a couple of things.
 Toxic Slime: This is just your basic Lime Sherbet and Sprite punch.
Turtle Juice: I know it looks a little morbid, but M wanted Fruit Punch as well, so I had to think of something.
 And of course...Cowabunga Cake: This is your basic triple layer Dark Chocolate Cake with Green Buttercream Icing.  One good thing about having a birthday near Christmas is that the Green frosting is available and on sale. :)
 I just wrapped a streamer around the cake, attached some marshmallows for the eyes and used some gel icing to pipe the pupils and Chi's Name.
 I get a little giddy around cake time. LOL
 This is the coolest candle by the way!  It lights up and changes colors.  Really cool for a kid's birthday cake (found at Walmart).
I think he liked it. :)
Here's one more picture of all the food for you. Even though it was a small spread (almost all of it was eaten...yippie), we had a great time and the kids loved it.  The pizza helps I think.

Well, that's it for my Birthday Tour.  Thanks for stopping by and I hope you have a great time throwing your very own TMNT birthday party for your special Turtle! :)

January 2, 2014

Avenger's Birthday Party

Success!  My little M turned 4 and he had a SUPER time!  There is a lot to show you about this party, so let's get started!!

First of all, here are some of the decorations!  This was the wall that was in the big room with the table.  I used a couple of $1 Tablecloths and taped them to the wall.  Then I hung a pre-made Birthday Banner and some store bought Star Twirly decoration things.
 Each room or decoration area had a couple of Heroes that made the theme/colors for that room.  This is the Iron Man and Thor Wall - RED, YELLOW and BLACK.  Worked out well!
Of Course, it would not be complete without these rosettes that I made out of scrapbook paper and cardstock!!  Want to know how to make these yourself?  I just followed a great tutorial I found online and decorated them with the icons of the Super Heroes.  Everyone got 2 rosettes.  One bigger and one smaller!  Of course, I forgot which tutorial I used and didn't Pin it, so if I find it I will link it here. Sorry. :)
 I think they turned out GREAT! It was a little time consuming to create so be forewarned!  That being said however, they were the most commented decoration at the party.  Worth the time in my opinion.
This is the Hulk/Hawk Eye Room.  Also known as the Food Table.  Under these streamers is my kid's artwork display in our breakfast area.  Usually I cover it up before hanging the streamers, but this was less work and looked fine!
 Of course here, the colors are GREEN, PURPLE and BLACK.  The boys liked this one the best!

 And here is the Captain America Corner!  The present opening space.  Captain America is M's favorite, so it was a must!
 Of course, the rosettes here will be able to be used again around the Fourth of July!! To decorate the area I used decorations I found on clearance from Walmart after the 4th!!  Very inexpensive and they looked great!!
 I did create this banner that showcased all of the Avengers for my little Super Hero!  Do you love it?!  You can get it at my Esty Shop here!!

 You can even get it with your little Super Hero's name on the banner too!
 Here are the Rosettes for Cap himself!
 Near the gifts I created this adorable Subway Art for my little Avenger!  I've made one for each birthday so far and the boys love it! Want one for your Super Hero?!  I have them available in my Etsy Shop as well!  Check it out here!
 Speaking of food!!! Check out this spread! A lot of thought went into this, so I hope you enjoy it!
 
 There's Iron Man Dad mixing up some Hulk Punch!  I tell you, there is no greater Man or Dad than one that will dress up like a Super Hero for his kid!  And a big plus that he helps out with the party food too!!  I love that man!
 First up on the Super Food tour is the "S.H.I.E.L.D. Spinach Dip.  It is just cold spinach dip and some chips.  I've also seen this done with Blue Corn Chips to make it look similar to the HULK.
 Of course, Hawkeye's Arrows for the veggie tray.  I cut the carrots, celery and peppers extra small so they would be uniform in size.  That's ranch dip in the center.  I used a sundae dish to put the dip in so that the veggies could fit on the plate around the stem!
 Here's Captain America's Shield for the Fruit Tray.  The star and white ring are mini marshmallows.  I formed the star by using a star shaped cookie cutter, putting the marshmallows in and then filling the area around it with the blueberries.  Once they and the 1st red ring was in place (raspberries) I lifted the cookie cutter and fixed the straggling marshmallows to look right!  The outer red ring are red delicious apples that we arranged to only show the peal.  This was a favorite for most of the kids and healthy too!!
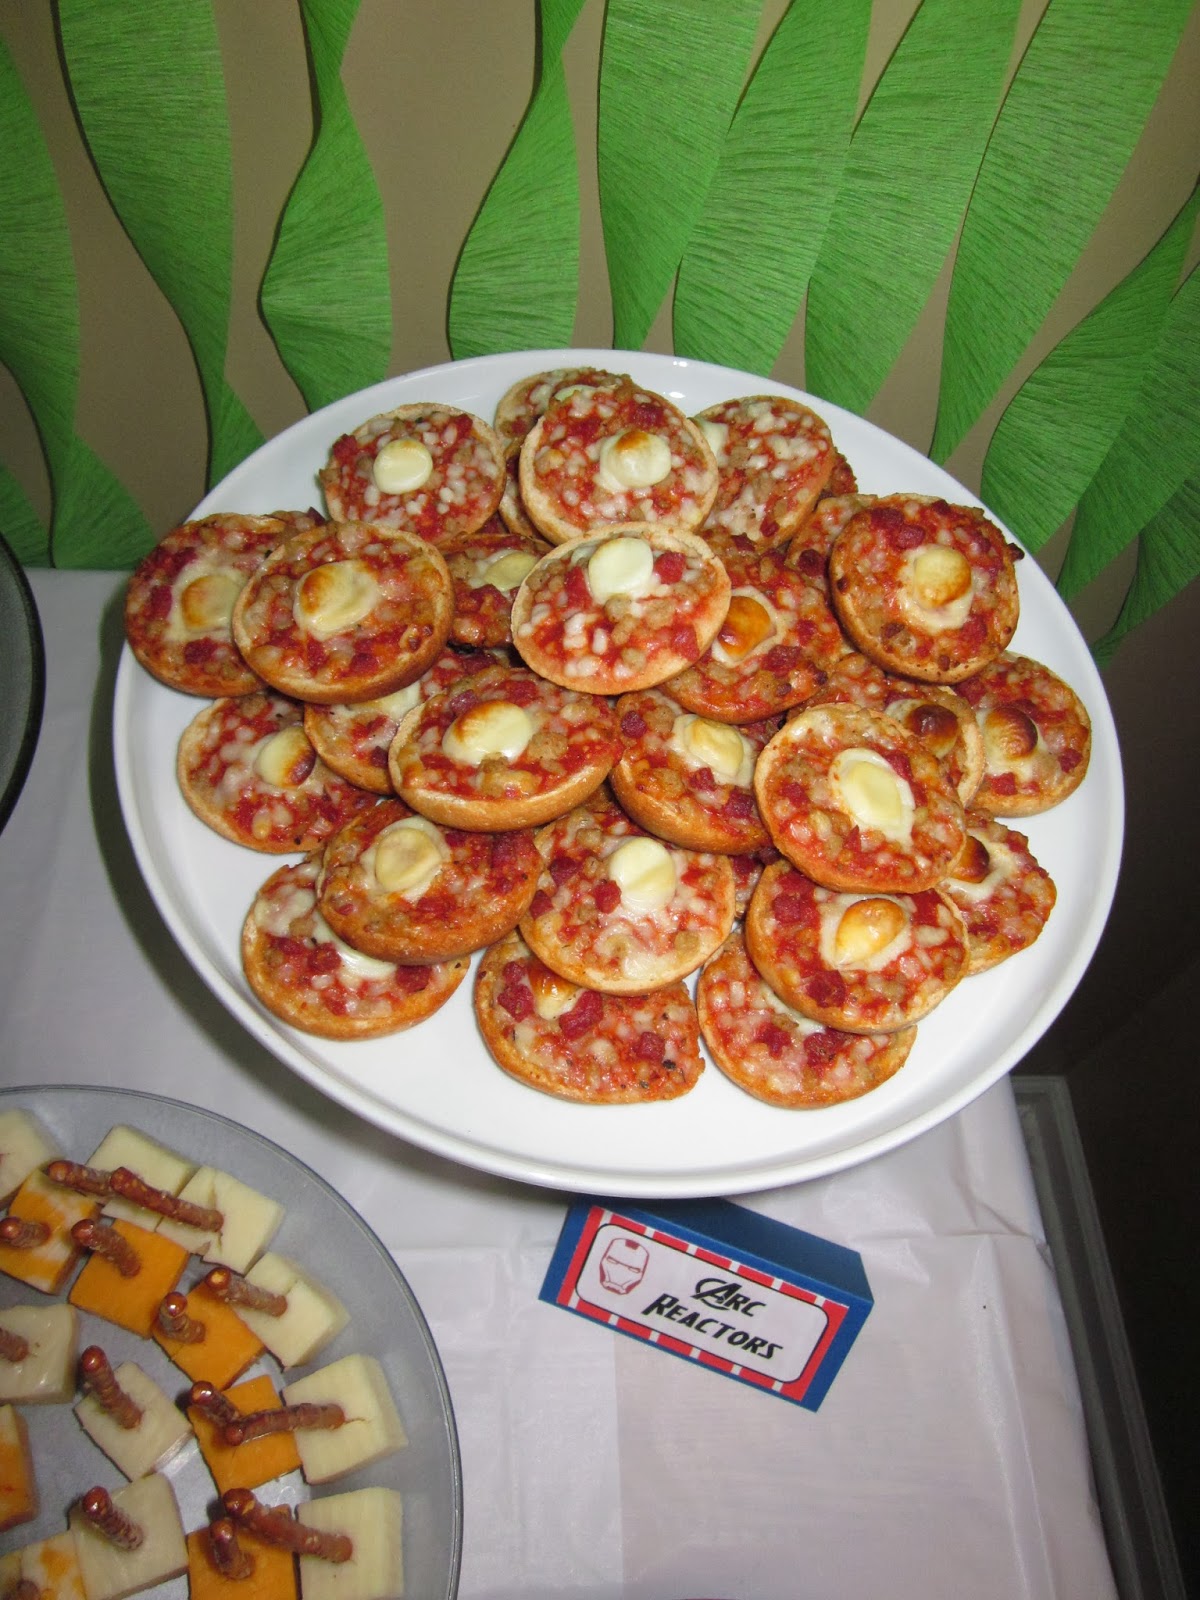
 Iron Man got the Arc Reactors.  These are bagel bites that I added a small slice of mozzarella cheese to the center.  I just cut string cheese into small slices to make this easy.  Then baked them and put them on a plate!
 Thor's Hammers are pretzel sticks into cubes of cheese.  I used 3 different kinds because I like variety.  The choices were Extra Sharp Cheddar, Mozzarella and Colby Jack.
 I needed something more of substance to serve since this party took place during lunchtime.  I decided that I wanted to do Pigs in a Blanket, but couldn't think of anything cute to call them.  Then someone suggested to call them something with a uniform or suit...this is what I thought of: Avengers Suit Up.  It worked and was delicious! :)
Here is the cake that I made.  It was an in depth 3 day process. I made the fondant from marshmallows using this tutorial.  That was Day 1.  Day 2 was making the cake.  Of course, since everything has to be extremely complicated and can never be simple, I couldn't just make a white cake.  I had to create this:
Everyone was very impressed!  Especially M!  Day 3 of course was assembling and decorating the cake to become what you see here!
The Star was made with powdered sugar and the same cookie cutter from the fruit tray.  I accidentally threw away the unused white fondant before I cut out the star to decorate the top.  Mistake, but I kinda liked how the star looked distressed and all as the result. I do have to say, the cake tasted DELICIOUS and very very sweet.  Not at all like cardboard.  This was my first attempt at making fondant, and I'm not sure if I will do it again, but this was very cool!
 To drink, M wanted to have Hulk Punch so Green Punch it is!
 There were two types of drinks to choose from.  The one in the punch bowl is your typical Lime Sherbert and Lemon-Lime Soda Mix that is served at every Baptist Wedding or event. It was served at ours in fact. :) I think this was the first thing I ever learned to make. :) The beverage container held the Lemonade. I added a couple of drops of blue food coloring to make it green!  Looked and tasted amazing!
 Here are some pictures of the table that all the kiddos sat at.  Just your basic party tablecloths, left over 4th of July decor and some Super Heroes!
 
 Fun, easy and decorative!
 
For Favors I made a few things.  All the boys got Cardboard Captain America Shields and the girls got these Super Hero Masks made out of cardstock.  All the children got some adorable Super Hero Capes made from fleece and Velcro.  No sewing involved! Everyone loved it!  
Here's a pic of my sister modeling all 3 items. :)
 We had a great time!  It was really fun to create this party.  I hope you can get some great ideas for a Super Party of your own!! M got the Captain America costume for his birthday and had to change into it mid party. :)